


5 Linear Shower Drains Installation Tips to Remember
Linear drains are getting popular among house owners because of their elegance and functionality. This makes it ideal for remodeling but even better for a new structure.
Installing linear drains is not as difficult but it can be tricky. To avoid embarrassing water pools and bathroom accidents, keep these tips handy while installing a linear drain.
1. Avoid water logging through slopes and elevated tiles
When it comes to showers, slopes are essential to avoid waterlogging. It is most advisable to place drains at one length of the wall/floor. This simplifies the sloping required in the bathroom as against if the drain is centralized.
Keep the slope dimensions in mind when installing linear drains. The floor of the bath area is angulated 2% or 1.15° per meter.
In addition, ensure that the floor tiles used to finish the bathroom are at an equal level with the drains, or at least 1 millimeter higher than the drains. If the drain is higher, more water will pool at the edge of the drain.
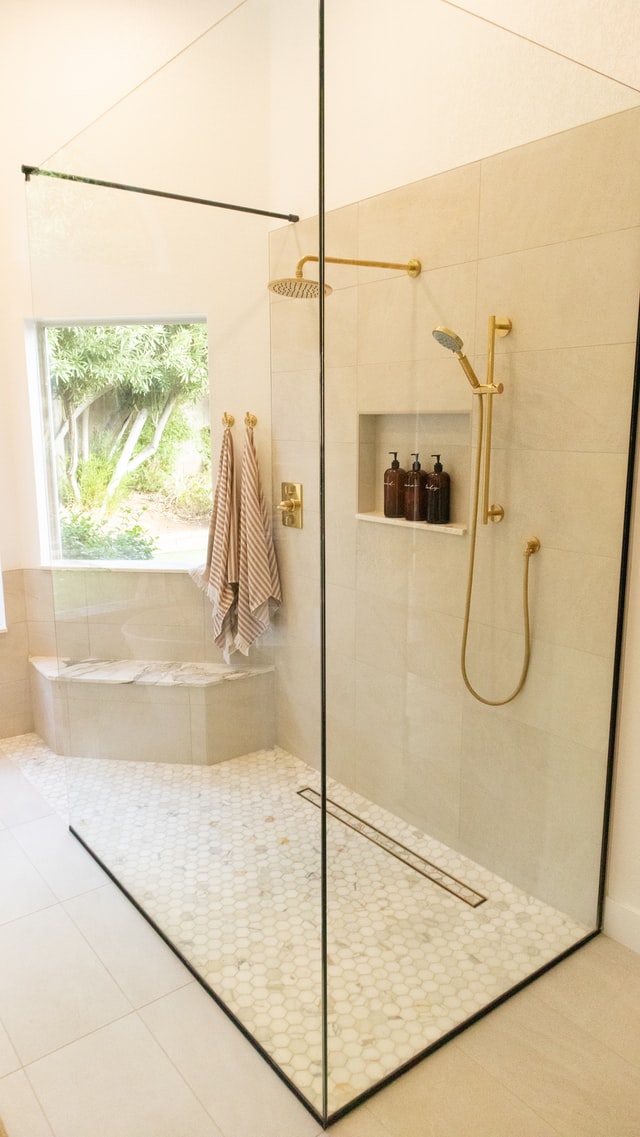
2. Drain placement matters
Keep in mind the location and position of the drains before installation. Drains can be positioned in an array of ways depending on several items of consideration such as if it’s a curbless bath or not. It can be floor mounted or wall mounted.
Drain placement determines the safety of its users. Since the rule about slopes is non-negotiable, it only makes sense that drains are placed at the door or opposite the door of curbless bathrooms.
If drains are positioned adjacent to the entrance door, it means that the floor slopes adjacent to the door. This can cause users to trip and fall.
3. Different lengths for different functions
Shower drains come in different styles as well as different lengths. For curbless bathrooms, a wall-to-wall drain works best for threshold showers either across the entrance or opposite it. Thinner or tile-in drains do not create adequate channel width for water drainage.
For curbless bathrooms, if the drains will be at the entrance, use one that covers the entire length of the entrance and not just the doorway. This prevents water pools at the corners.
4. Consider flow rates of drains
Before installation, find out how many gallons of water the drain can evict per minute. For most cases, linear drains can contain eight to ten gallons per minute. However, several factors should also be considered.
These factors include:
- The flow rate of the shower valve
- Number of shower valves
- Water pressure at the site location
- Number of water features (hand showers, body sprays, etc)
- Local plumbing code
Each of these variables determines the gallons per minute of water the linear drain will have to tackle. Failure to put these into consideration will create water pools in the bathroom. Scout through the linear shower drains by Profilpas to find drains that tally with different bathroom needs.
5. Waterproofing type
Traditional waterproofing requires a shower pan made from PVC, hot mop, vinyl, fiberglass, or lead materials. Most of these materials need to be fixed between mortars before tile placement.
Modern waterproofing makes use of liquid or fiber install and tile can be placed directly on them. The modern type of waterproofing allows for shallower drains since it saves floor space. The traditional type elevates the floor, and that requires deeper drains.
Conclusion
Linear drains require only a one-directional slope making installation more seamless than centered drains. Ensure to take note of different local codes before installing drains. Proper installations and maintenance can keep your drain functioning for a very long time.


